The cookie settings on this website are adjusted to allow all cookies so that you have the very best experience. If you continue without changing your cookie settings, we'll assume that you are happy to receive all cookies on our website. However, if you would like to, you can change your settings at any time using the Change cookie settings link in the Special menu. 
    
 
+44 (0)20-84520161 Contact Us
Now FREE Delivery on UK mainland orders over £30+VAT

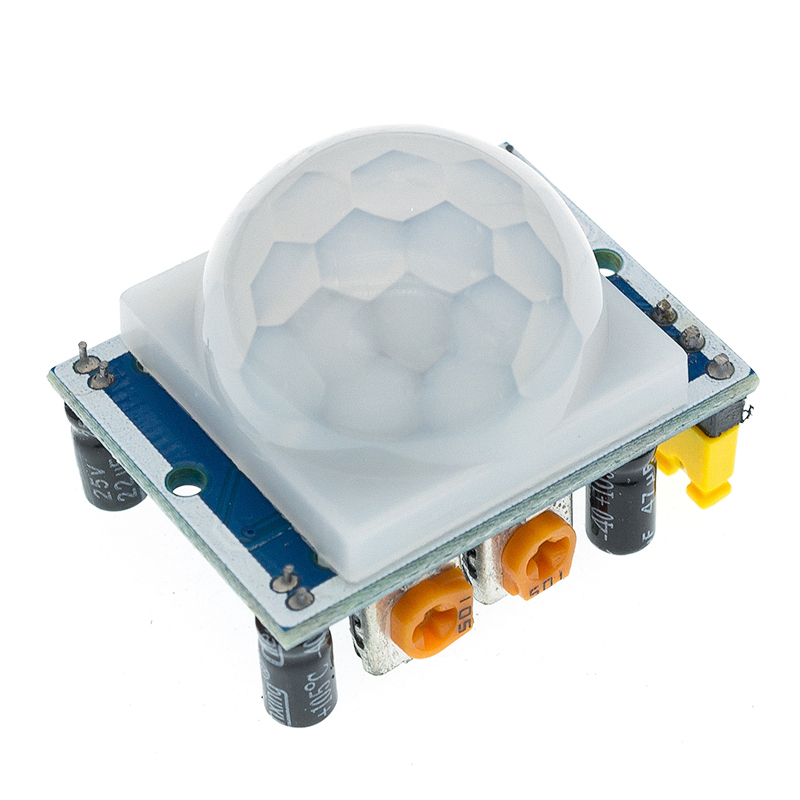
PIR Sensor Module for Arduino

  • Details

  • Recommended

  • Send

Details

Item Number
HCSR501
Item Condition
New
Price
£2.50 (inc VAT £3.00)

Options

Quantity


  • 16 Pin Standard IC Socket

    16 Pin Standard IC Socket

    IC Socket Stamped Pin Standard 16 pin

    SDL16
    £0.14
  • 16 pin Turned IC Socket

    16 pin Turned IC Socket

    IC High Quality Turned Pin Socket. Totally protected from solder. Gold plated contacts 16 pin

    TDL16
    £0.50
  • 7 Segment Display Common Cathode High Efficiency Red 7.62mm 0.3"

    7 Segment Display Common Cathode High Efficiency Red 7.62mm 0.3"

    7 Segment Display Common Cathode High Efficiency Red 7.62mm (0.3") 2000mcd.

    Z76RC
    £2.00
  • I2C Parallel to Serial Converter for Arduino Type LCD Screens

    I2C Parallel to Serial Converter for Arduino Type LCD Screens

    I2C Paralel to 2 Pin Serial converter for Arduino type LCD screens

     
    This converter can be soldered directly to a standard 1602 LCD screen to convert it to the more convenient 2 pin serial (I2C) used in many Arduino projects.
    There is a removable jumper to allow connection with both backlit and non backlit screens.
    A potentiometer can adjust the brightness & contrast of the LCD.
     
     
    Connections
    GND = Ground
    VCC =  5V
    SDA = Serial Data Line
    SCL = Serial Clock Line 
     
     
    KY1602
    £2.50
  • SG90 Micro Servo 9g

    SG90 Micro Servo 9g

    SG90 Micro Servo for Arduino and other microcontroller projects

     
    This micro servo is the most popular 9g servo in the world.
    It is used for Radio Control models, robotics plus many other uses.
    Compatible with Arduino and other microcontroller projects.
    Supplied with 3 different servo horns and fixing screws.
     
     
    Voltage : 5VDC
    Speed : 60 Degrees in 0.12 second
    Torque : 1.8kg/cm
    Wire Length : 150mm
    Size : 23x12.2x29mm
    Weight : 9g
    SG90
    £2.75
  • Bright Clear Red 5mm LED 2400mcd

    Bright Clear Red 5mm LED 2400mcd

    Bright Red 5mm LED Water Clear. 2400mcd, 1.8-2.0V 20mA 

    R5K
    £0.20
  • Arduino Uno R3 Starter Kit with RFID

    Arduino Uno R3 Starter Kit with RFID

    UNO R3 Arduino-compatible starter kit complete with an Arduino Uno board with essential accessories, plus a multitude of parts and modules to start building interesting projects

    The Arduino is a great bit of kit for anyone interested in electronics.

    This kit comes with everything you need to get started with an Arduino (apart from a PC to program it).

    This is the newer RFID version of the kit, containing more useful sensors and parts to make your introduction to Arduino a better experience. 

     
    Supplied with the kit:
    Arduino UNO R3 
    USB A to B 200mm 
    830 Tie Points Breadboard
    10x 200mm Male to Female Jumper Cables
    32x  Male to Male Jumper Cables
    2 x 36 Pin Male Single in Line header
    1602 16 character 2 Row backlit LCD Display 
    I2C SPI Serial Interface Board (LCD Piggyback) 
    DS1302 Real Time Clock Module
    RC522 RFID Kit
    7 Segment Single Digit LED Display
    7 Segment Four Digit LED Display
    8 x 8 LED Dot Matrix
    74HC595 8 Bit Shift Register
    Water Level Sensor
    ULN2003 Four Phase Stepper Motor Driver
    28BYJ-48 5V Four Phase Stepper Motor 
    KY019 5V Relay Module
    KY015 Temperature and Humidity Module
    KY016 RGB LED Module
    KY037 Sound Sensor 
    KY023 Dual Axis Joystick Module
    PP3 Battery Snap with 2.1mm x 5.5mm plug
    Infrared Remote Control
    Infrared Transmitter/Receiver
    4x4 16 Button Matrix
    SG90 Servo Motor
    2 x SW-520 Tilt Sensor
    Active Piezo Buzzer
    Passive Piezo Buzzer
    10 x Blue LED
    10 x Red LED
    10 x Yellow LED 
    3 x Light Dependent Resistor
    Flame Sensor/ Infrared Receiver
    LM35 Temperature Sensor
    10KΩ Linear Potentiometer (Variable Resistor)
    10 x 220Ω Resistors
    10 x 1KΩ Resistors
    10 x 10kΩ Resistors
    10 x 330R Resistors
    4 x 10mm Tactile Switches
    4 x Tactile Switch Caps
    Infrared Receiver
    Resistor Colour Code Chart
    CD with projects
    Carry Case
     
    The Arduino IDE Software can be downloaded from the Arduino website here
     
    You can download a copy of the included CD here

    Arduino CD


    Arduino Quick Start Guide


    Installing the Arduino IDE

    1. Go to arduino.cc/en/software and download the appropriate version for your system.
    2. Run the installation file (usually called arduino-1.xx.xx-windows.exe).
    3. Follow the on-screen instructions to complete the installation process.
       

    Connecting the Arduino to a computer

    1. Connect the Arduino to your computer using the USB cable provided.
    2. Open the Arduino IDE and click on “Tools”. When prompted by windows firewall click allow.
    3. Move the cursor over “Board” and select your Arduino board from the list (e.g. “Arduino Uno”).
    4. Click on “Tools” again and move the cursor over “Port”. Now, select the USB port where the Arduino is plugged in. If you have multiple devices under “Ports” and you are unsure which one is the Arduino, try selecting one of the ports and then click on “Tools” and select “Get board info”. If the Arduino port is selected, a small window displaying the board information will appear, otherwise keep trying different ports until the window appears.
    5. To check if the Arduino is connected correctly, click on the “Upload” button at the top of the screen (button with arrow pointing to the right) and wait for the empty sketch to upload. If no errors come up, you’re all set up and ready to go!
       

    Installing Arduino Libraries

    Method 1

    1. Open the Arduino IDE and click on “Tools” at the top of the screen.
    2. Click on “Manage Libraries”.
    3. Type in the name of the library you wish to install (e.g. “CCS811”) and press enter.
    4. The Library Manager will now display a number of relevant libraries. Hover the cursor over the required library and click “Install”. When the installation has finished, close the Library Manager window.


    Method 2

    1. Download the library you wish to install.
    2. Extract the folder from the zip file and paste it in the following location:

             Windows XP and above: C:\Users\%username%\Documents\Arduino\Libraries

             Mac: /Users/<username>/Documents/Arduino/libraries/

             Linux: /usr/share/arduino/libraries/ (you must delete the dashes in the folder name, if there are any)

    1. Restart the Arduino IDE.
    AUR3K
    £40.00
  • WS2812 High Brightness Individually Addressable RGB LED Strip Cut to Length

    WS2812 High Brightness Individually Addressable RGB LED Strip Cut to Length

    WS2812 RGB LED Strip Cut to Length 

    The WS2812 is a smart RGB (Red, Green, Blue) LED module that is capable of displaying up to 16,777,216 colours at 256 different levels of brightness per LED. Each LED can be controlled individually using a microcontroller (e.g. Arduino, NodeMCU).

    The LEDs are mounted on a flexible PCB and are cut to length (minimum 10 LEDs, max. 720 LEDs). 

    Specifications:

    LED Density: 144 LEDs/metre
    Input Voltage: 5V DC


    WS2812B-S
    £0.30
  • 2 Way 2.54mm (0.1") Pitch Header Socket

    2 Way 2.54mm (0.1") Pitch Header Socket

    2 Way Header Socket, 2.54mm Pitch

    1 row of 2 pins 2.54mm (0.1") Pitch


    HSW2
    £0.25

Send to Friend

: *
: *
: *
Type the characters you see in the picture:


*

PIR sensor module for Arduino and other microcontroller projects

 
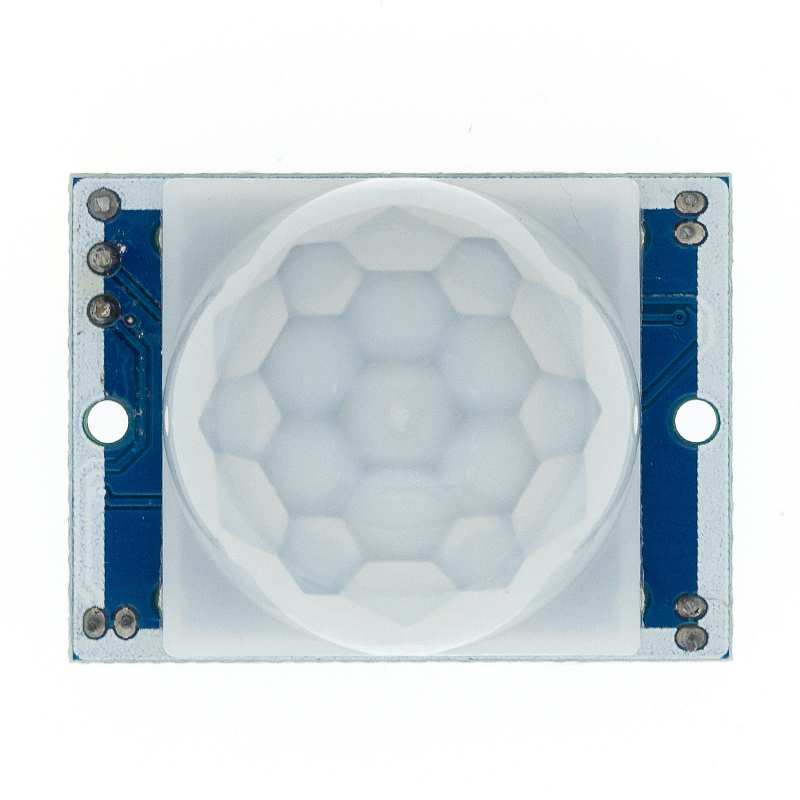
The HCSR501 is a PIR (Passive Infra-Red) sensor that can detect the presence of people by measuring the infrared radiation radiated by the body. It can be used in a vast and diverse number of projects, including but not limited to: automated lighting systems, burglar alarms, automated door systems, etc.

Principle of operation
All objects with a temperature above absolute zero (0 kelvin) emit electromagnetic radiation. The higher the temperature of the object, the smaller the wavelength of the radiation emitted. The normal human body temperature is 37°C (310.2 kelvin) and it therefore emitts infrared radiation (mostly at a wavelength of 12µm). The PIR sensor can sense when a person has walked into its field of view by measuring the difference in the infrared radiation received from the ambient environment and the human body. 
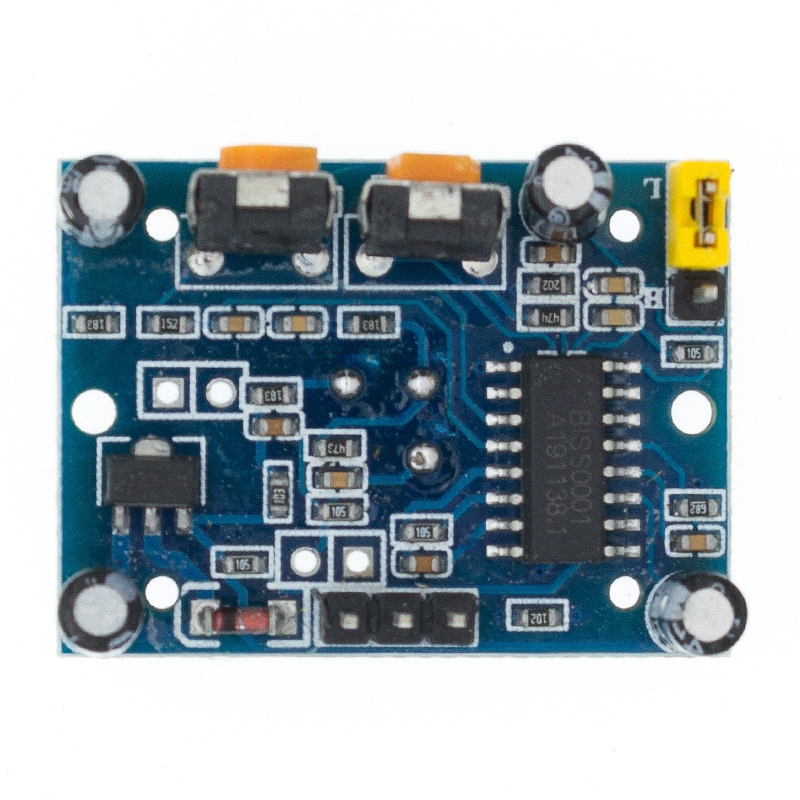
 
Voltage : 5-20VDC
Power Consumption: 64mA
Logic output: 3.3V
Range: 7 metres, (<120°)
Lock Time: 200 miliseconds
Operating temperature range: between -15°C and 70°C
 

Recently Viewed


Trustpilot