The cookie settings on this website are adjusted to allow all cookies so that you have the very best experience. If you continue without changing your cookie settings, we'll assume that you are happy to receive all cookies on our website. However, if you would like to, you can change your settings at any time using the Change cookie settings link in the Special menu. 
    
 
+44 (0)20-84520161 Contact Us
Now FREE Delivery on UK mainland orders over £30+VAT

Arduino Uno Revision 3 Development Board

  • Details

  • Recommended

  • Send

Details

Item Number
AUR3
Item Condition
New
Price
£14.00 (inc VAT £16.80)

Options

Quantity


  • 4mm Banana Socket Terminal Post Black

    4mm Banana Socket Terminal Post Black

    Terminal Post with 4mm Banana recptacle & Binding Post for bare wire or Spade Connectors: Black

    4TB
    £0.75
  • Low Current Diffused 5mm Red LED

    Low Current Diffused 5mm Red LED

    Red 5mm Diffused Low Current LED 0.8mcd @ 2mA.

    R5L
    £0.15
  • CR2032 Lithium Coin Cell 20 x 3.2mm

    CR2032 Lithium Coin Cell 20 x 3.2mm

    Lithium Coin Cell. 3 Volts. Extremely long shelf & active life. 20 X 3.2mm.

    CR2032
    £1.50
  • Miniature Relay DPDT 12VDC 2Amps

    Miniature Relay DPDT 12VDC 2Amps

    Relay Double Pole Changeover 12V 2A @ 28VDC, 500mA @ 125VAC. 280 ohms. Operating Range 9V to 18V

    RUT12
    £2.25
  • Arduino Nano Revision 3 Development Board

    Arduino Nano Revision 3 Development Board

    Arduino compatible board with the ATMEGA328P microcontroller

    The Arduino Nano is a small, breadboard-friendly version of the Arduino UNO.

    It has the same functionality as the Arduino Duemilanove but at a much smaller size.

    The Arduino Nano is well suited for rapid prototyping and as a great general-purpose microcontroller. 

    Since Arduino is open source hardware & software, anyone can copy the Arduino Nano boards exactly, even using original parts.

    We are therefore able to supply this Arduino identical compatible board at a fraction of the cost of the original.

    Key Features

    Variable Input Voltage (7-12V)

    Indicator LEDs for immediate feedback

    Compact Form Factor (45mm x 19mm)

    14 Digital I/O pins

    8 Analog I/O pins

    16 MHz clock speed

    32kb flash memory (of which 2kb is used by the bootloader)


    Software can be downloaded from the Arduino website here

    https://www.arduino.cc/en/Main/Software

    Arduino Quick Start Guide


    Installing the Arduino IDE

    1. Go to arduino.cc/en/software and download the appropriate version for your system.
    2. Run the installation file (usually called arduino-1.xx.xx-windows.exe).
    3. Follow the on-screen instructions to complete the installation process.
       

    Connecting the Arduino to a computer

    1. Connect the Arduino to your computer using the USB cable provided.
    2. Open the Arduino IDE and click on “Tools”. When prompted by windows firewall click allow.
    3. Move the cursor over “Board” and select your Arduino board from the list (e.g. “Arduino Nano”).
    4. Click on “Tools” again and move the cursor over “Port”. Now, select the USB port where the Arduino is plugged in. If you have multiple devices under “Ports” and you are unsure which one is the Arduino, try selecting one of the ports and then click on “Tools” and select “Get board info”. If the Arduino port is selected, a small window displaying the board information will appear, otherwise keep trying different ports until the window appears.
    5. To check if the Arduino is connected correctly, click on the “Upload” button at the top of the screen (button with arrow pointing to the right) and wait for the empty sketch to upload. If no errors come up, you’re all set up and ready to go!
       

    Installing Arduino Libraries

    Method 1

    1. Open the Arduino IDE and click on “Tools” at the top of the screen.
    2. Click on “Manage Libraries”.
    3. Type in the name of the library you wish to install (e.g. “CCS811”) and press enter.
    4. The Library Manager will now display a number of relevant libraries. Hover the cursor over the required library and click “Install”. When the installation has finished, close the Library Manager window.


    Method 2

    1. Download the library you wish to install.
    2. Extract the folder from the zip file and paste it in the following location:

             Windows XP and above: C:\Users\%username%\Documents\Arduino\Libraries

             Mac: /Users/<username>/Documents/Arduino/libraries/

             Linux: /usr/share/arduino/libraries/ (you must delete the dashes in the folder name, if there are any)

    1. Restart the Arduino IDE.
    AUN3
    £8.75
  • SG90 Micro Servo 9g

    SG90 Micro Servo 9g

    SG90 Micro Servo for Arduino and other microcontroller projects

     
    This micro servo is the most popular 9g servo in the world.
    It is used for Radio Control models, robotics plus many other uses.
    Compatible with Arduino and other microcontroller projects.
    Supplied with 3 different servo horns and fixing screws.
     
     
    Voltage : 5VDC
    Speed : 60 Degrees in 0.12 second
    Torque : 1.8kg/cm
    Wire Length : 150mm
    Size : 23x12.2x29mm
    Weight : 9g
    SG90
    £2.75
  • Digital Panel Meter for Voltage and Current 0-100VDC 0-10ADC

    Digital Panel Meter for Voltage and Current 0-100VDC 0-10ADC

    Dual Display Panel Meter, 0-100VDC and 0-10ADC 

     
    This handy compact panel meter will display the voltage and current clearly. It is ideal for a bench power supply or any project that requires accurate voltage and or current measurement. The meter can either be powered from the supply it is measuring if it is between 4.5-30VDC or from an independant power source.
     
    Voltage Measurment : 0 - 100VDC
    Current Measurment : 0 - 10ADC
    Working Voltage : 4.5 - 30VDC
    Dimensions : (W)48mm x (H)29mm x (D)22mm
     
    Connetions
    Red (Thick) - Voltage in for Current Measurment
    Black (Thick) - Voltage out for Current Measurment
    Red (Thin) - Supply Positive 4.5-30VDC
    Black (Thin) - Supply Ground
    Yellow (Thin) - Voltage to be Measured 0-100VDC
    DPM
    £5.50
  • 20mm Panel Fuse Holder With Screw on Cap

    20mm Panel Fuse Holder With Screw on Cap

    Panel fuseholder with screw on cap for 20mm fuses 

    Acceptsr 5mm x 20mm fuses
    -
    • Rated 10A 250V AC
    • Plastic Body and cap.
    • Easy Finger release
    • Solder terminal lugs
    • Dimensions 37.7 x 15mm
    • UL flame 94V-2 approved
    FU20PT
    £1.00
  • WS2812 High Brightness Individually Addressable RGB LED Strip Cut to Length

    WS2812 High Brightness Individually Addressable RGB LED Strip Cut to Length

    WS2812 RGB LED Strip Cut to Length 

    The WS2812 is a smart RGB (Red, Green, Blue) LED module that is capable of displaying up to 16,777,216 colours at 256 different levels of brightness per LED. Each LED can be controlled individually using a microcontroller (e.g. Arduino, NodeMCU).

    The LEDs are mounted on a flexible PCB and are cut to length (minimum 10 LEDs, max. 720 LEDs). 

    Specifications:

    LED Density: 144 LEDs/metre
    Input Voltage: 5V DC


    WS2812B-S
    £0.30

Send to Friend

: *
: *
: *
Type the characters you see in the picture:


*

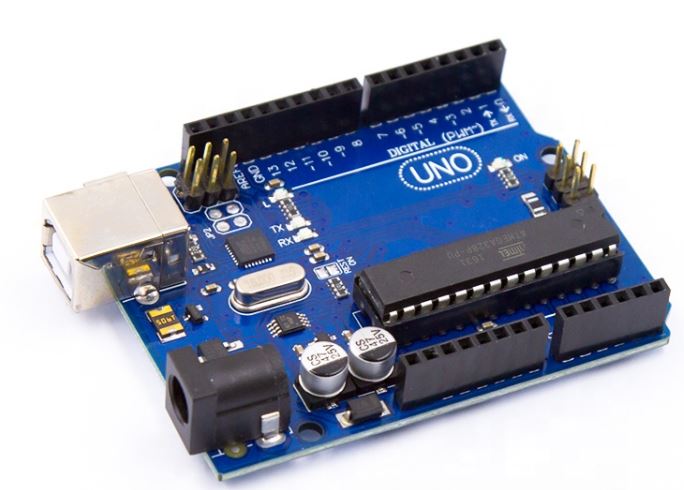
UNO R3 Arduino-compatible board with the ATMega328P, ATMega16U2 and CH340G serial converter

Since Arduino is an "Open Source" hardware as well as software; anyone can duplicate the Arduino Uno R3 boards exactly, even using original parts, this means we are able to supply this Arduino compatible board at a fraction of the cost of the original but still working identicaly to the original.

The UNO is the best board to get started with electronics and coding. If this is your first experience tinkering with the platform, the UNO is the most robust board you can start playing with. The UNO is the most used and documented board of the whole Arduino family.

Arduino Uno is a microcontroller board based on the ATmega328P. It has 14 digital input/output pins (of which 6 can be used as PWM outputs), 6 analog inputs, a 16 MHz quartz crystal, a USB connection, a power jack, an ICSP header and a reset button. The development board has everything needed to support the microcontroller to help you create an endless amount of projects and if you are just starting then the worldwide Arduino community is full of ideas, guides and help to get you started or help you complete your project. 
 
Supplied 
1 x Arduino Compatible Uno R3 development board
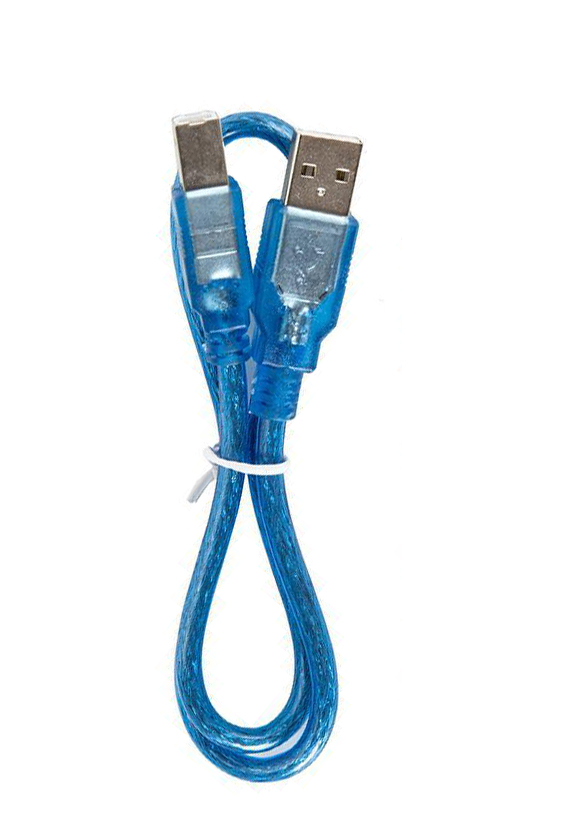
1 x USB Cable
 

Arduino Quick Start Guide


Installing the Arduino IDE

  1. Go to arduino.cc/en/software and download the appropriate version for your system.
  2. Run the installation file (usually called arduino-1.xx.xx-windows.exe).
  3. Follow the on-screen instructions to complete the installation process.
     

Connecting the Arduino to a computer

  1. Connect the Arduino to your computer using the USB cable provided.
  2. Open the Arduino IDE and click on “Tools”. When prompted by windows firewall click allow.
  3. Move the cursor over “Board” and select your Arduino board from the list (e.g. “Arduino Uno”).
  4. Click on “Tools” again and move the cursor over “Port”. Now, select the USB port where the Arduino is plugged in. If you have multiple devices under “Ports” and you are unsure which one is the Arduino, try selecting one of the ports and then click on “Tools” and select “Get board info”. If the Arduino port is selected, a small window displaying the board information will appear, otherwise keep trying different ports until the window appears.
  5. To check if the Arduino is connected correctly, click on the “Upload” button at the top of the screen (button with arrow pointing to the right) and wait for the empty sketch to upload. If no errors come up, you’re all set up and ready to go!
     

Installing Arduino Libraries

Method 1

  1. Open the Arduino IDE and click on “Tools” at the top of the screen.
  2. Click on “Manage Libraries”.
  3. Type in the name of the library you wish to install (e.g. “CCS811”) and press enter.
  4. The Library Manager will now display a number of relevant libraries. Hover the cursor over the required library and click “Install”. When the installation has finished, close the Library Manager window.


Method 2

  1. Download the library you wish to install.
  2. Extract the folder from the zip file and paste it in the following location:

         Windows XP and above: C:\Users\%username%\Documents\Arduino\Libraries

         Mac: /Users/<username>/Documents/Arduino/libraries/

         Linux: /usr/share/arduino/libraries/ (you must delete the dashes in the folder name, if there are any)

  1. Restart the Arduino IDE.

Recently Viewed


Trustpilot