The cookie settings on this website are adjusted to allow all cookies so that you have the very best experience. If you continue without changing your cookie settings, we'll assume that you are happy to receive all cookies on our website. However, if you would like to, you can change your settings at any time using the Change cookie settings link in the Special menu. 
    
 
+44 (0)20-84520161 Contact Us
Now FREE Delivery on UK mainland orders over £30+VAT

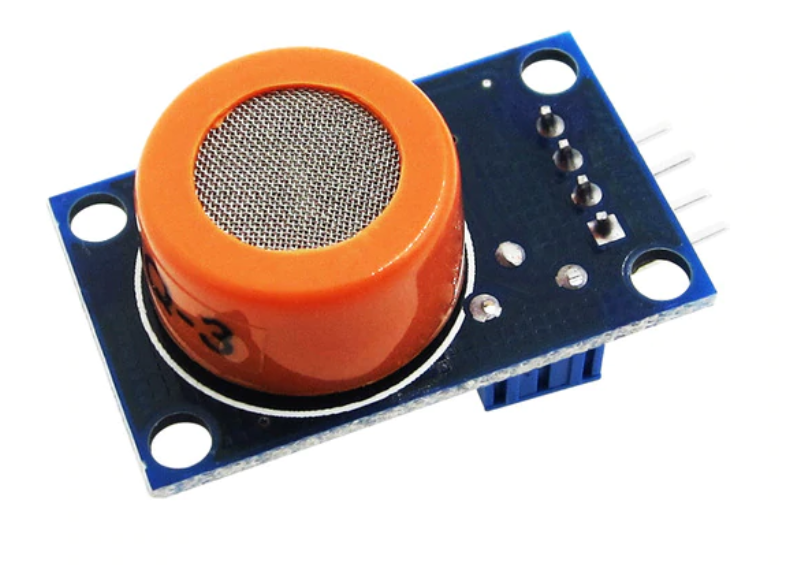
Methane gas sensor module for Arduino MQ-4

  • Details

  • Recommended

  • Send

Details

Item Number
MQ4
Item Condition
New
Price
£2.50 (inc VAT £3.00)

Options

Quantity


  • Temperature and humidity module for Arduino KY-015

    Temperature and humidity module for Arduino KY-015

    What is the KY-015 DHT11 Module?

    The KY015 is a temperature and humidity module for Arduino and other microcontroller projects


    KY-015 module has a DHT11digital temperature and humidity sensor and a resistor. The DHT11 uses a thermistor for the temperature sensing and a capacitive humidity sensor along with an internal IC to give a digital output for both temperature and humidity.


    Voltage : 3.3 to 5VDC

    Humidity range : 20% to 90% @ 5% RH accuracy

    Temperature range : 0C to 50C at 2C accuracy

    Size 30x15mm


    How Can I use the KY-015 Module to monitor temperature and humidity?

    Here is an example project to measure temperature and humidity using the KY015 module and an Arduino Uno


    Temperature and Humidity Sensor

    In this project, we will be building a weather station that can measure both temperature and humidity.

    This is what you will need:

    Tools

    Jumper Leads (male to female)


    Components

    Arduino Uno x 1 or Arduino Nano x 1

    KY-15 sensor module


    Libraries

    DHT Sensor Library

    Adafruit Unified Sensor Library


    Step 1

    First you will nedd to assemble the project. Connect everything together using the wiring diagram bellow for reference.


    Connect the KY-015 sensor module to the Arduino

    KY-015                        Arduino   

    Ground - - - - - - - - - -  Ground
    Vcc - - - - - - - - - - - - - - 3v3
    Data - - - - - - - - - - - - -  A0

    A 10KΩ pull-up resistor is built in to the KY-015


    Step 2

    Connect your Arduino to the PC and install the above Libraries. If you don’t know how to do this, CLICK HERE and follow the “Installing Arduino Libraries” section.


    Step 3

    We can now create the code to get this all working

    First, delete the code in the IDE window, then include the aforementioned libraries:  

    #include "DHT.h"

    This bit of code imports the DHT library and links it to the sketch.

    #define DHTPIN A0
    #define DHTTYPE DHT11

    This bit of code defines which pin is KY015 connected to and sets the type of sensor (KY015 uses DHT11)

    DHT dht(DHTPIN, DHTTYPE);

    This bit of code initialises the sensor

    void setup() {
      Serial.begin(115200);
      Serial.println(F("DHT11 test!"));
      dht.begin();
    }

    The setup bit of code initialises serial output with baud rate of 115200 and prints DHT11 test! In the console

    void loop() {
       delay(2000);

    This bit makes the Arduino wait 2 seconds between measurements

      float h = dht.readHumidity();

    Read humidity from the sensor

      float t = dht.readTemperature();
    Read temperature from the sensor
      Serial.print(F("Humidity: "));
      Serial.print(h);
      Serial.print(F("%  Temperature: "));
      Serial.print(t);
      Serial.println(F("°C "));
    }

    Print the latest reading in serial monitor


    Finished Code:

    #include "DHT.h"
    
    #define DHTPIN A0 // Digital pin connected to the DHT sensor
    #define DHTTYPE DHT11 // DHT 11
    DHT dht(DHTPIN, DHTTYPE);
    
    void setup() {
      Serial.begin(115200);
      Serial.println(F("DHT11 test!"));
    
      dht.begin();
    }
    
    void loop() {
      delay(2000);
    
      float h = dht.readHumidity();
      float t = dht.readTemperature();
    
      Serial.print(F("Humidity: "));
      Serial.print(h);
      Serial.print(F("%  Temperature: "));
      Serial.print(t);
      Serial.println(F("°C "));
    }


    KY015
    £2.50
  • GY-521 3 Axis Accelerometer Gyroscope module for Arduino MPU-6050

    GY-521 3 Axis Accelerometer Gyroscope module for Arduino MPU-6050

    3 Axis accelerometer and gyroscope module for Arduino and other microcontroller projects

    This module has an MPU-6050 accelerometer and gyroscope IC on a GY-521 breakout board, making it easy to use this amazing sensor.

    The MPU-6050 gives an accurate position and movement data via the standard I2C protocol making it simple to add to your project.


    Voltage : 3-5VDC

    Gyroscope Range 250 500 1000 2000 / s

    Acceleration Range : 2 4 8 16g 

    Size 22x16mm

    GY521
    £2.50
  • Soil Hygrometer module for Arduino

    Soil Hygrometer module for Arduino

    Soil hygrometer module with digital and analogue outputs for Arduino and other microcontroller projects

     
    This module has a seperate 2 pronged moisture detector that is inserted into the soil and then connected to the comparitor board using the supplied link wires. It can give out a digital (High/Low) signal at a certain moisture level that can be set by adjusting the potentiometer on the board. There is also an analogue output to give you a more precise reading of the moisture level in the soil.
     
    Voltage : 3.3 to 5VDC
    Comparitor PCB Size 30x16mm
    KYSH
    £2.50
  • Ethanol Alcohol Gas Sensor Module for Arduino MQ-3

    Ethanol Alcohol Gas Sensor Module for Arduino MQ-3

    Alcahol Ethanol sensor module for Arduino and other microcontroller projects

     
    A sensitive ethanol sensor will detect levels of alcahol in the air. The level of alcohol varies the output voltage. A comparator gives a digital output. When the ethanol level reaches a certain level, this can be set with the built in potentiometer.
     
    Please note: this sensor needs to run for 24-48 hours before first time use
    Voltage : 5VDC
    Current : 300mA
    Sensitivity : 0.4mg/L alcohol
    Size 32x21mm
    MQ3
    £2.50
  • CJMCU-811CO2 VOC Air quality Module with CCS811 for Arduino and other microcontroller projects

    CJMCU-811CO2 VOC Air quality Module with CCS811 for Arduino and other microcontroller projects


    What is the CJUMCU-811 Module?

    CO2 and VOC indoor air quality sensor module for Arduino and other microcontroller projects

    This module has a CCS811 module that is an ultra low powered digital gas sensor using a metal oxide multi compound sensor. The module uses the onboard MCU to manage the sensor and provide the needed Analogue to Digital conversion and I2C interface making it simple to add to your project. It will detect a wide range of VOCs including Carbon Monoxide and can convert this to an eCO2 (equivalent CO2) value.
     

    Voltage: 3.3VDC 

    Size: 21x15mm
     

    How Can I use the CJUMCU-811 to test air quality and CO2 levels?


    Here is an example project for an air quality meter using the CJUMCU-811, an Arduino Uno and a 1602 LCD screen with a KY1602 to display CO2 levels and air quality:


    Air Quality Sensor with LCD

    In this project, we will be building an air quality station that can measure eCO2 (estimated carbon dioxide) levels and a wide range of VOCs (Volatile Organic Compounds). High VOC levels can contribute to a wide range of health complications and high CO2 levels (>1000ppm) can impair normal cognitive function, so it is useful to be able to monitor them.


    Here’s what you will need:
     

    Tools
    Soldering Iron
    Solder
    Jumper Leads (male to female)

    Components
    CJMCU811 x 1
    LCD1602B LCD screen x1
    Arduino Uno x 1 or Arduino Nano x 1
    KY1602 Parallel to Serial converter
     

    Libraries

    CCS811 Arduino Library

    PCF8574 Arduino Library


    Step 1
    First you will need to assemble the project. The CJMCU should come with a set of pin headers that need to be soldered directly on it and the KY1602 should be soldered directly to the back of the LCD screen. Now, connect everything together using the wiring diagram below for reference.


    Connecting the CJMCU811 to an Arduino       Connecting the KY1602 to an Arduino and a 1602 LCD 
    CJMCU                           Arduino                     KY1602                          Arduino            LCD
    VCC----------------------------3.3V                       VCC-----------------------------5V
    GND----------------------------GND                      GND----------------------------GND
    SCL------------------------------A5                        SCL-----------------------------A5
    SDA-----------------------------A4                         SDA-----------------------------A4
                                                                            Pins 1-16---------------------------------------Pins 1-16*


     *pin 1 on the KY1602 is the one nearest to the 4 data and power pins


    Step 2
    Connect your Arduino to the PC and install the above Libraries. If you don’t know how to do this, CLICK HERE and follow the “Installing Arduino Libraries” section.

    Step 3
    We can now create the code to get this all working:

    First, delete the code in the IDE window, then include the aforementioned libraries:  

     
    #include <LCD_I2C.h>
    #include <Wire.h>
    #include "SparkFunCCS811.h"


    Now, We need to declare the I2C devices and their addresses:  

     
    #define CCS811_ADDR 0x5B
    LCD_I2C lcd(0x27, 16, 2);
    CCS811 sensor(CCS811_ADDR);


    Initialize the I2C devices and turn on lCD backlight in the setup function:

     
    void setup()
    {
      Wire.begin();
      lcd.begin();
      lcd.backlight();


    Start serial communication  

    Serial.begin(115200);
    delay(1000);

    Check to see if the CJMCU is configured correctly, otherwise display error message:

     
    if (sensor.begin() == false)
      {
      Serial.print("Sensor error. Check connection");
      while (1);
      }


    Starting the void loop function. Check to see if the data from the sensor is available, and if so, read and calculate the results:

     
    if (sensor.dataAvailable())
      {
      sensor.readAlgorithmResults();


    Send the data via serial port:

     
    Serial.print("CO2[");
      Serial.print(sensor.getCO2());
      Serial.print("] tVOC[");
      Serial.print(sensor.getTVOC());


    Display the same data on the LCD display:

     
    lcd.setCursor(0,0);
    lcd.print("Est. CO2 - ");
      lcd.print(sensor.getCO2());
      lcd.setCursot(0,1);
    lcd.print("Tot. VOC - ");
      lcd.print(sensor.getTVOC());
      }


    Add 10ms delay to prevent overloading the I2C bus:

     
    delay(10);


    The completed code should look like this:


    /* 
    Connecting the CJMCU811 to an Arduino Uno or an Arduino Nano: 
    
    CJMCU811 Arduino
    VCC-------------->3V3
    GND-------------->GND
    SCL-------------->A5
    SDA-------------->A4
    */
     
    #include <lcd_i2c.h>
    #include <wire.h>
    #include "SparkFunCCS811.h"
    LCD_I2C lcd(0x27, 16, 2); //Address of the KY1602 module
    #define CCS811_ADDR 0x5A //if it doesn't work, change to 0x5B
    
    CCS811 sensor(CCS811_ADDR);
    
    void setup()
    {
      Wire.begin(); //Initialize I2C Hardware
    
      lcd.begin(); // If you are using more I2C devices using the Wire.h library, use lcd.begin(false)
    
      lcd.backlight();
    
      Serial.begin(115200);  //Starting serial communication
      delay(1000);
    
     
      if (sensor.begin() == false)
      {
      Serial.print("Sensor error. Check connection");
      while (1);
      }
    }
    
    void loop()
    {
      if (sensor.dataAvailable())//Check to see if data is ready with .dataAvailable(). if statement checking to see 
      {
      //If so, have the sensor read and calculate the results.
      sensor.readAlgorithmResults();
     
      Serial.print("CO2["); //Returns estimated CO2 reading
      Serial.print(sensor.getCO2());
      Serial.print("] tVOC[");//Returns calculated total VOC reading
      Serial.print(sensor.getTVOC());
    
      lcd.setCursor(0,0);
      lcd.print("Est. CO2 - ");
      lcd.print(sensor.getCO2());
      lcd.setCursor(0,1);
      lcd.print("Tot. VOC - ");
      lcd.print(sensor.getTVOC());
      }
      delay(10); //Prevents overloading of the I2C bus
    }


    Step 4 Press the “Upload” button at the top (button with tick, located below “File”). The IDE will now compile the code and upload it to your Arduino (this may take a few moments).

    Step 5 To check if everything is working, open the serial monitor from the Arduino IDE (magnifying glass button in the top right corner) and see if you can get a reading. The CJMCU has to be left on for 24 hours before it will give a correct reading. If everything is connected correctly, the LCD should also show readings from the sensor.

    Step 6 That’s it! You should now have a fully working air quality sensor. Now all you need to decide is what sort of enclosure you want to put it in. You can look at our high quality boxes HERE for ideas.


    CJMCU811
    £16.50
  • MQ2 Combustible Gas & Smoke Sensor

    MQ2 Combustible Gas & Smoke Sensor

    Combustible gas and smoke sensor module for Arduino and other microcontroller projects

     
    This module has a sensitive gas sensor that can measure smoke and various combustible gases. It can measure compunds such as LPG, Propane, Methane and smoke. The sensor outputs a varying voltage on the analogue pin depending on the level of gases present and it has a comparator to give you a digital output when the level of combustible gases reaches a certain level. This can be set with the built-in potentiometer.
     
    Please note, this sensor needs to warm up for a couple of minutes before it will give a stable reading.
     
    Voltage : 5VDC
    Current : 150mA
    Sensitivity : 300 to 10000ppm
    Size 32x21mm
    MQ2
    £3.50

Send to Friend

: *
: *
: *
Type the characters you see in the picture:


*

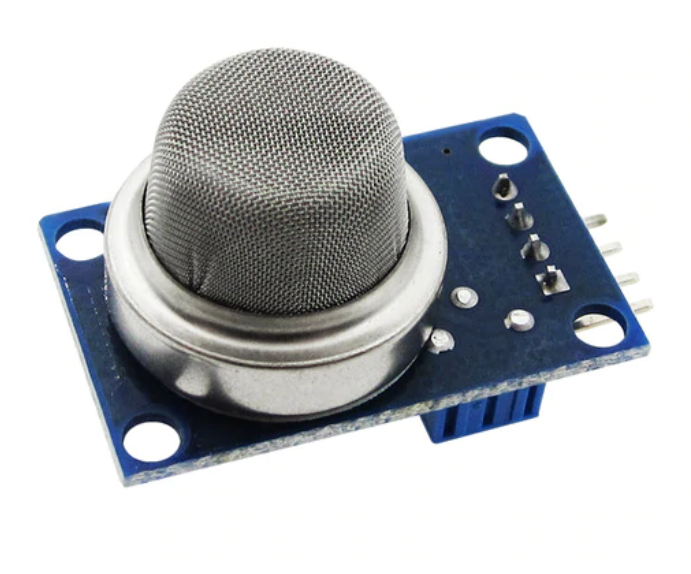
Methane gas sensor module for Arduino and other microcontroller projects

 
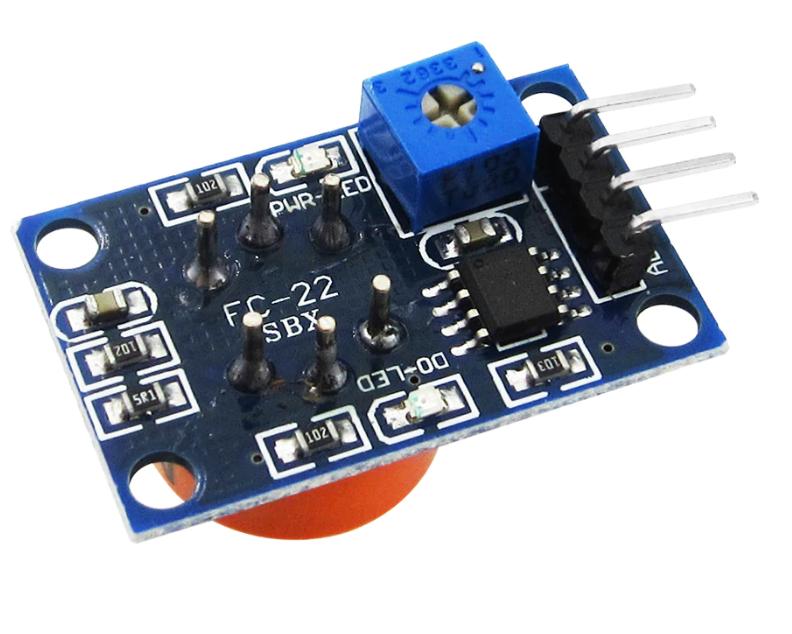
This module has a sensitive methane sensor that will detect levels of methane in the air. The sensor outputs a varying voltage on the analogue pin depending on the level of methane and it has a comparator to give you a digital out at when the methane level reaches a certain level, this can be set with the built in potentiometer.
 
Please note, this sensor needs to warm up for 20 seconds before it will give a stable reading.
 
Voltage : 5VDC
Current : 150mA
Sensitivity : 300 to 10000ppm
Size 32x21mm

Recently Viewed


Trustpilot